L4Re on Raspberry Pi#
This is a demo of some capabilities of open source L4Re Operating System Framework running on the Raspberry Pi 4B. It demonstrates L4Re’s virtualization capabilities as well as running native L4Re MicroApps.
This demo features two virtual machines (VMs). The first VM runs OpenWRT and acts as an on-device firewall. The second VM runs Raspian Lite and connects through OpenWRT to the internet. A native L4Re MicroApp periodically blinks the green activity LED of the Raspberry Pi. The persistent storage for the VMs is provided by a native eMMC driver which securely provides individual partitions to each VM.
Getting Started#
Download the current demo image (SHA256 checksum) for the SD card.
Flash the image to a SD card (size >= 8GB)
Linux#$ zcat rpi4_l4re_demo-202506.img.gz | dd of=/dev/<SD_card_dev_node> bs=10M status=progress
Mac#$ zcat < rpi4_l4re_demo-202506.img.gz | dd of=/dev/rdisk<X> bs=10M status=progress
Once the flashing has finished put the SD card into your Raspberry Pi 4.
Connect a USB2Serial adapter to your Raspberry Pi 4 and then to your computer.
Connect Ethernet cable to your Raspberry Pi (make sure you have a DHCP server running in your network, your usual home router should do it).
Connect terminal program e.g. minicom:
$ minicom -D /dev/serial/by-id/<serial_adapter> -b 115200
Connect the power adapter and let the Raspberry Pi boot
You will see the boot messages in your terminal program
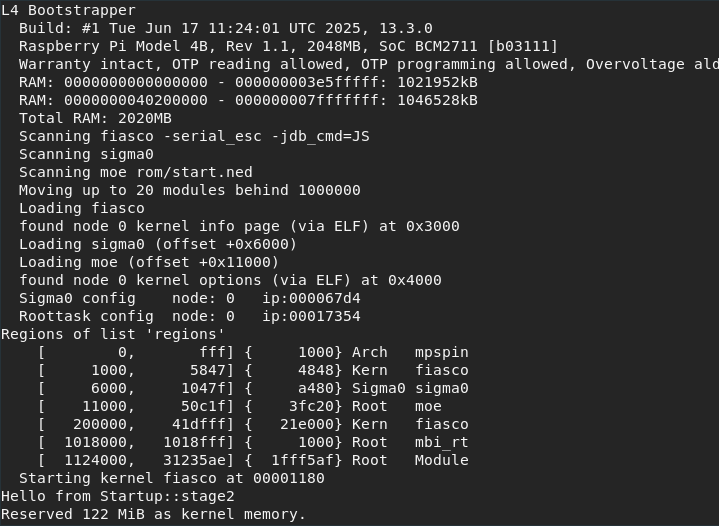
Screenshot of L4Re boot messages#
Troubleshooting
Make sure hardware flow-control is disabled.
If
ddfails due to permission problems, ensure your current user is in the plugdev group, or usesudoor run as root.If minicom returns with permission problems, make sure your current user is in the dialout group:
$ sudo usermod -a -G dialout <your user>
Welcome to L4Re#
Once L4Re has booted you will be greeted by the L4Re console cons. It allows you to connect to different client consoles.
demo> help   # list available commands
demo> ls     # list connected clients
          emmc     [        ] out:   84/  4900 in:    0/    0
   ex_gpio_led     [    demo] out:    1/    28 in:    0/    0
            io     [        ] out:  228/ 11373 in:    0/    0
          mbox     [        ] out:    1/    67 in:    0/    0
           net     [        ] out:   27/  1911 in:    0/    0
    vm_openwrt (1) [        ] out:  328/ 19499 in:    0/    0
    vm_raspian (2) [        ] out:  516/ 37126 in:    0/    0
You can see 2 virtuals machines (VMs) running: vm_openwrt and vm_raspian.
Connect to the VM consoles
demo> connect vm_openwrt
To discconnect from a client console press CTRL+e . (“Ctrl e” plus “dot”)
The VMs#
OpenWRT#
If your PC and the Rasperry Pi are connected to the same network you can access the OpenWRT web interface.
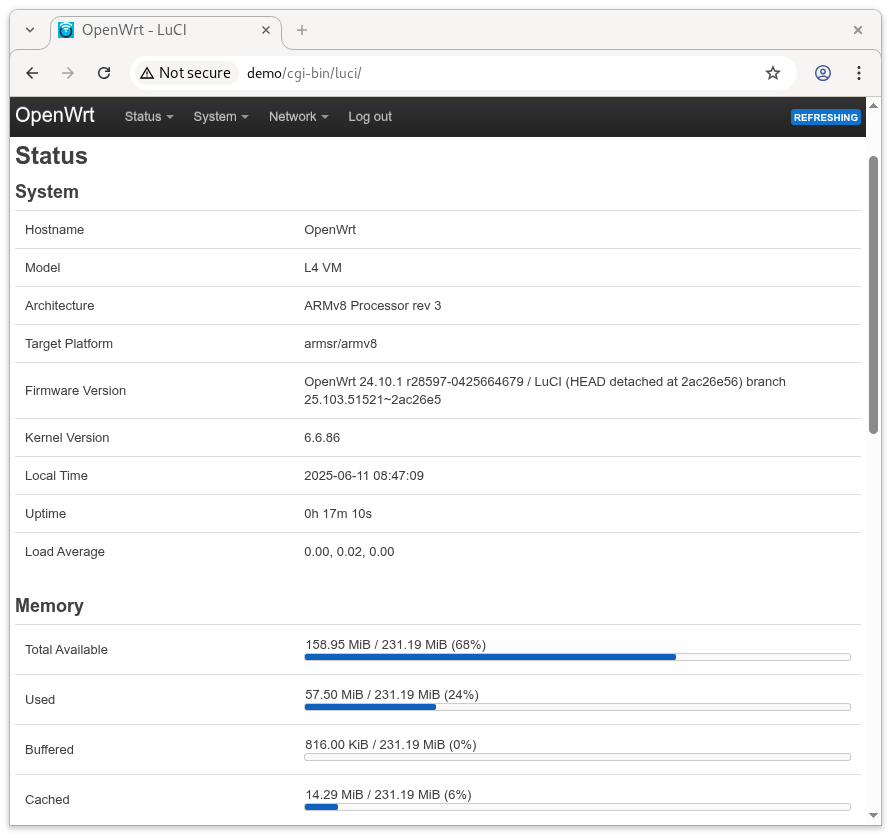
Screenshot of OpenWrt web interface#
Find out the IP address of the OpenWRT VM:
demo> connect vm_openwrt
$ ip a
In your browser navigate to http://<ip_address_of_openwrt> and just login as the root user, no password is set.
Raspian Lite#
Login to Raspian:
demo> connect vm_raspian
Note
If the Raspberry Pi is connected to a network via Ethernet you can connect to the internet. OpenWRT is NAT’ing the network access.
pi:~ $ ping www.l4re.org
pi:~ $ sudo apt update
Native MicroApps#
eMMC driver#
See output from eMMC driver:
demo> cat emmc
ex_gpio_led#
This MicroApp makes the Raspberry Pi’s activity LED blink.
Looking into the Disk Image#
To take a look under the hood, follow the following link, to see how we can look into a disk image.